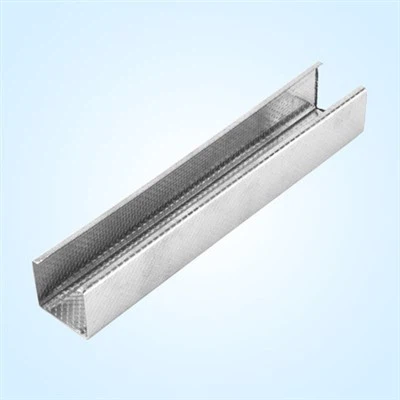
As a cold-formed steel stud supplier, I've witnessed firsthand the importance of proper installation in ensuring the effectiveness of firewalls. Cold-formed steel studs offer numerous advantages, including high strength, lightweight, and resistance to corrosion, making them an ideal choice for firewall construction. In this blog post, I'll share a comprehensive guide on how to install cold-formed steel studs in a firewall, covering everything from preparation to finishing touches.
Pre-Installation Preparation
Before you begin installing cold-formed steel studs, it's crucial to make thorough preparations. This includes gathering the necessary tools and materials, reviewing the building plans, and ensuring a safe working environment.
Tools and Materials
- Measuring Tools: Tape measure, level, and square to ensure accurate measurements and alignment.
- Cutting Tools: Tin snips, reciprocating saw, or a metal cutting blade for a circular saw to cut the steel studs to the required length.
- Fastening Tools: Drill, screw gun, and appropriate screws or nails for attaching the studs to the framing members.
- Safety Equipment: Safety glasses, gloves, and a dust mask to protect yourself from potential hazards.
- Cold-formed Steel Studs: C Type Stud and U Track Channel in the appropriate sizes and gauges for your firewall design.
- Insulation: Fire-resistant insulation material, such as mineral wool or fiberglass, to enhance the fire resistance of the firewall.
- Fire-Rated Drywall: Gypsum board with a fire rating suitable for your application to provide a protective barrier.
Review the Building Plans
Carefully review the building plans to understand the layout, dimensions, and specifications of the firewall. Pay attention to the location of doors, windows, electrical outlets, and other penetrations, as these will require special attention during installation.
Ensure a Safe Working Environment
Clear the work area of any debris, tools, or equipment that could pose a tripping hazard. Set up proper lighting and ventilation to ensure good visibility and air quality. If working on an elevated surface, use appropriate fall protection equipment, such as a safety harness and scaffolding.
Layout and Marking
Once you've completed the pre-installation preparation, it's time to start laying out and marking the location of the cold-formed steel studs. This step is crucial for ensuring accurate installation and proper alignment of the firewall.
Determine the Stud Spacing
The stud spacing will depend on the design requirements of your firewall and the load-bearing capacity of the cold-formed steel studs. Typically, stud spacing for firewalls ranges from 16 to 24 inches on center. Refer to the building plans or consult with a structural engineer to determine the appropriate stud spacing for your project.


Mark the Stud Locations
Using a tape measure and a level, mark the location of the top and bottom tracks on the floor, ceiling, and walls. Make sure the marks are straight and level, and that they align with the stud spacing determined in the previous step. Use a chalk line or a straightedge to connect the marks and create a reference line for installing the tracks.
Mark the Location of Penetrations
If there are any doors, windows, electrical outlets, or other penetrations in the firewall, mark their locations on the floor, ceiling, and walls. Use a template or a cardboard cutout to ensure accurate placement of the penetrations.
Install the Tracks
The next step is to install the top and bottom tracks for the cold-formed steel studs. The tracks provide a framework for the studs and help to keep them in place during installation.
Cut the Tracks to Length
Using a cutting tool, cut the U Track Channel to the required length. Make sure the cuts are straight and square, and that they fit snugly against the floor, ceiling, and walls.
Install the Bottom Track
Place the bottom track on the floor, aligning it with the reference line marked in the previous step. Use a drill and appropriate screws or nails to attach the track to the floor. Make sure the track is level and secure, and that it is flush with the floor surface.
Install the Top Track
Place the top track on the ceiling, aligning it with the reference line marked in the previous step. Use a drill and appropriate screws or nails to attach the track to the ceiling. Make sure the track is level and secure, and that it is flush with the ceiling surface.
Install the Studs
Once the tracks are installed, it's time to install the cold-formed steel studs. This step requires careful attention to detail to ensure proper alignment and connection of the studs.
Cut the Studs to Length
Using a cutting tool, cut the C Type Stud to the required length. Make sure the cuts are straight and square, and that they fit snugly into the top and bottom tracks.
Insert the Studs into the Tracks
Starting at one end of the firewall, insert the studs into the top and bottom tracks, aligning them with the marks made in the previous step. Make sure the studs are plumb and level, and that they are evenly spaced according to the stud spacing determined earlier.
Secure the Studs to the Tracks
Use a drill and appropriate screws or nails to secure the studs to the top and bottom tracks. Make sure the screws or nails are driven in straight and that they are tightened securely. Repeat this process for each stud until all the studs are installed.
Install the Insulation
After the studs are installed, it's time to install the fire-resistant insulation. Insulation helps to enhance the fire resistance of the firewall and provides additional soundproofing and energy efficiency.
Cut the Insulation to Size
Using a utility knife or a pair of scissors, cut the insulation material to the appropriate size and shape to fit between the studs. Make sure the insulation is snugly packed and that there are no gaps or voids.
Install the Insulation
Starting at the bottom of the firewall, insert the insulation between the studs, pressing it firmly into place. Make sure the insulation is evenly distributed and that it covers the entire surface of the studs. Repeat this process for each bay between the studs until all the insulation is installed.
Install the Fire-Rated Drywall
The final step in installing a cold-formed steel stud firewall is to install the fire-rated drywall. The drywall provides a protective barrier and helps to contain the spread of fire and smoke.
Cut the Drywall to Size
Using a utility knife and a straightedge, cut the fire-rated drywall to the appropriate size and shape to fit the firewall. Make sure the cuts are straight and square, and that the drywall is slightly larger than the opening to allow for trimming.
Install the Drywall
Starting at one end of the firewall, place the drywall against the studs, aligning it with the edges of the tracks. Use a drill and appropriate screws or nails to secure the drywall to the studs. Make sure the screws or nails are driven in straight and that they are tightened securely. Repeat this process for each sheet of drywall until the entire firewall is covered.
Tape and Mud the Seams
After the drywall is installed, use drywall tape and joint compound to tape and mud the seams between the sheets of drywall. This step is crucial for creating a smooth and seamless surface and for preventing the spread of fire and smoke through the seams.
Conclusion
Installing cold-formed steel studs in a firewall requires careful planning, preparation, and attention to detail. By following the steps outlined in this guide, you can ensure a successful installation that meets the highest standards of safety and performance. As a cold-formed steel stud supplier, we are committed to providing high-quality products and expert support to help you achieve your construction goals. If you have any questions or need further assistance with your firewall installation, please don't hesitate to contact us. We look forward to working with you on your next project.
References
- International Building Code (IBC)
- National Fire Protection Association (NFPA) standards
- Cold-formed Steel Engineers Institute (CFSEI) design guides