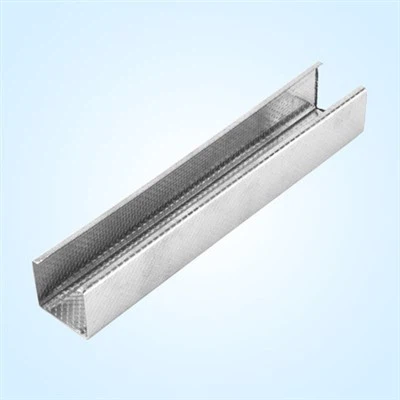
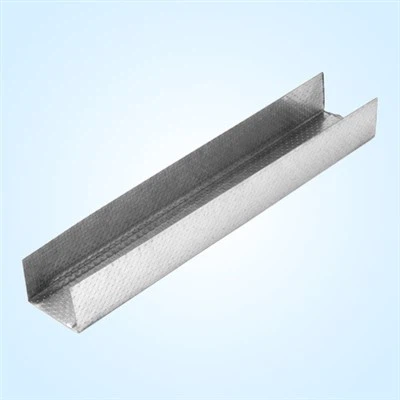
Constructing a professional drywall partition is a precise and multi-faceted engineering process that requires a comprehensive list of specific components to ensure the finished wall is structurally stable, properly insulated, and flawlessly finished. The foundational skeleton of any modern partition system is constructed from high-quality galvanized steel studs, which provide a rust-resistant and durable frame that outperforms traditional timber in both longevity and fire safety. This framework primarily consists of two main profiles: the horizontal U Track Channel and the vertical C Type Stud. The installation process begins by fixing the U Track Channels securely to both the floor and the ceiling, establishing the exact perimeter of the wall. Within this track, the C Type Studs are placed vertically, typically spaced at standard intervals of either 400mm or 600mm centers depending on the required structural load and the total height of the wall. To ensure that this entire steel framework is anchored firmly to the existing concrete or brick structure of the building, installers utilize specialized nylon plugs and high-strength screws. Furthermore, in areas where doors or windows are to be installed, a technique known as boxing-where two C Type Studs are joined together to form a square column-is employed to provide the necessary extra rigidity and support around the structural openings, preventing future warping or mechanical failure of the door or window frame.
Once the primary steel framework is fully assembled and inspected for perfect vertical alignment, the next critical phase involves the installation of the internal core. This usually consists of high-density rock wool board or industrial rock wool, which is packed tightly between the vertical studs to serve as both an acoustic and thermal barrier. This layer is essential for modern interior environments, as it significantly reduces noise transfer between adjacent rooms and improves the overall energy efficiency of the building. Following the insulation, the boarding phase begins, which requires the careful selection of materials based on the specific environmental conditions of the room. A professional builder will categorize their materials carefully: standard plasterboard is utilized for general dry areas like bedrooms or offices, whereas moisture-resistant plasterboard is essential for wet zones such as bathrooms, laundries, or kitchens. In commercial or industrial settings where safety regulations are more stringent, fire-resistant plasterboard is incorporated into the design to meet strict local building codes. These boards are secured to the galvanized steel studs using specialized drywall screws that feature a unique bugle head design. This specific head shape is critical because it allows the screw to sit just below the surface without tearing the protective paper face of the board, which maintains the structural integrity of the drywall.
The final stage of the process is focused on creating a seamless and aesthetically pleasing surface that is ready for final decoration. To achieve this, builders use joint tape and joint compound to cover the seams where the boards meet, as well as the heads of the screws. This jointing process, often involving multiple layers of compound and careful sanding, is what transforms individual boards into a single, continuous, and flat wall surface. In scenarios where the wall is intended to be finished with heavy tiles, such as in a luxury bathroom or a commercial kitchen, additional specialized components are required. This includes the use of high-quality vitrified tile adhesive or ceramic tile thinset mortar. These adhesives are applied using a notch trowel, which ensures an even distribution of the mortar and creates a strong mechanical bond between the tile and the wall surface. In areas designated as high-impact zones, such as hallways in schools or hospitals, builders may opt for fiber cement board instead of standard plasterboard for its superior durability. This substitution requires the use of different, more robust screws and a specialized primer to ensure proper adhesion of subsequent finishes. Finally, for a complete interior solution, the partition system is often integrated with the ceiling structure using ceiling studs or click-type ceiling studs if a suspended or drop ceiling is included in the architectural design. By meticulously ensuring that all these components-from the initial U Track Channel to the final layer of thinset mortar-are of high quality and correctly installed, a contractor can deliver a partition that is durable, fireproof, and perfectly aligned with the original architectural vision.